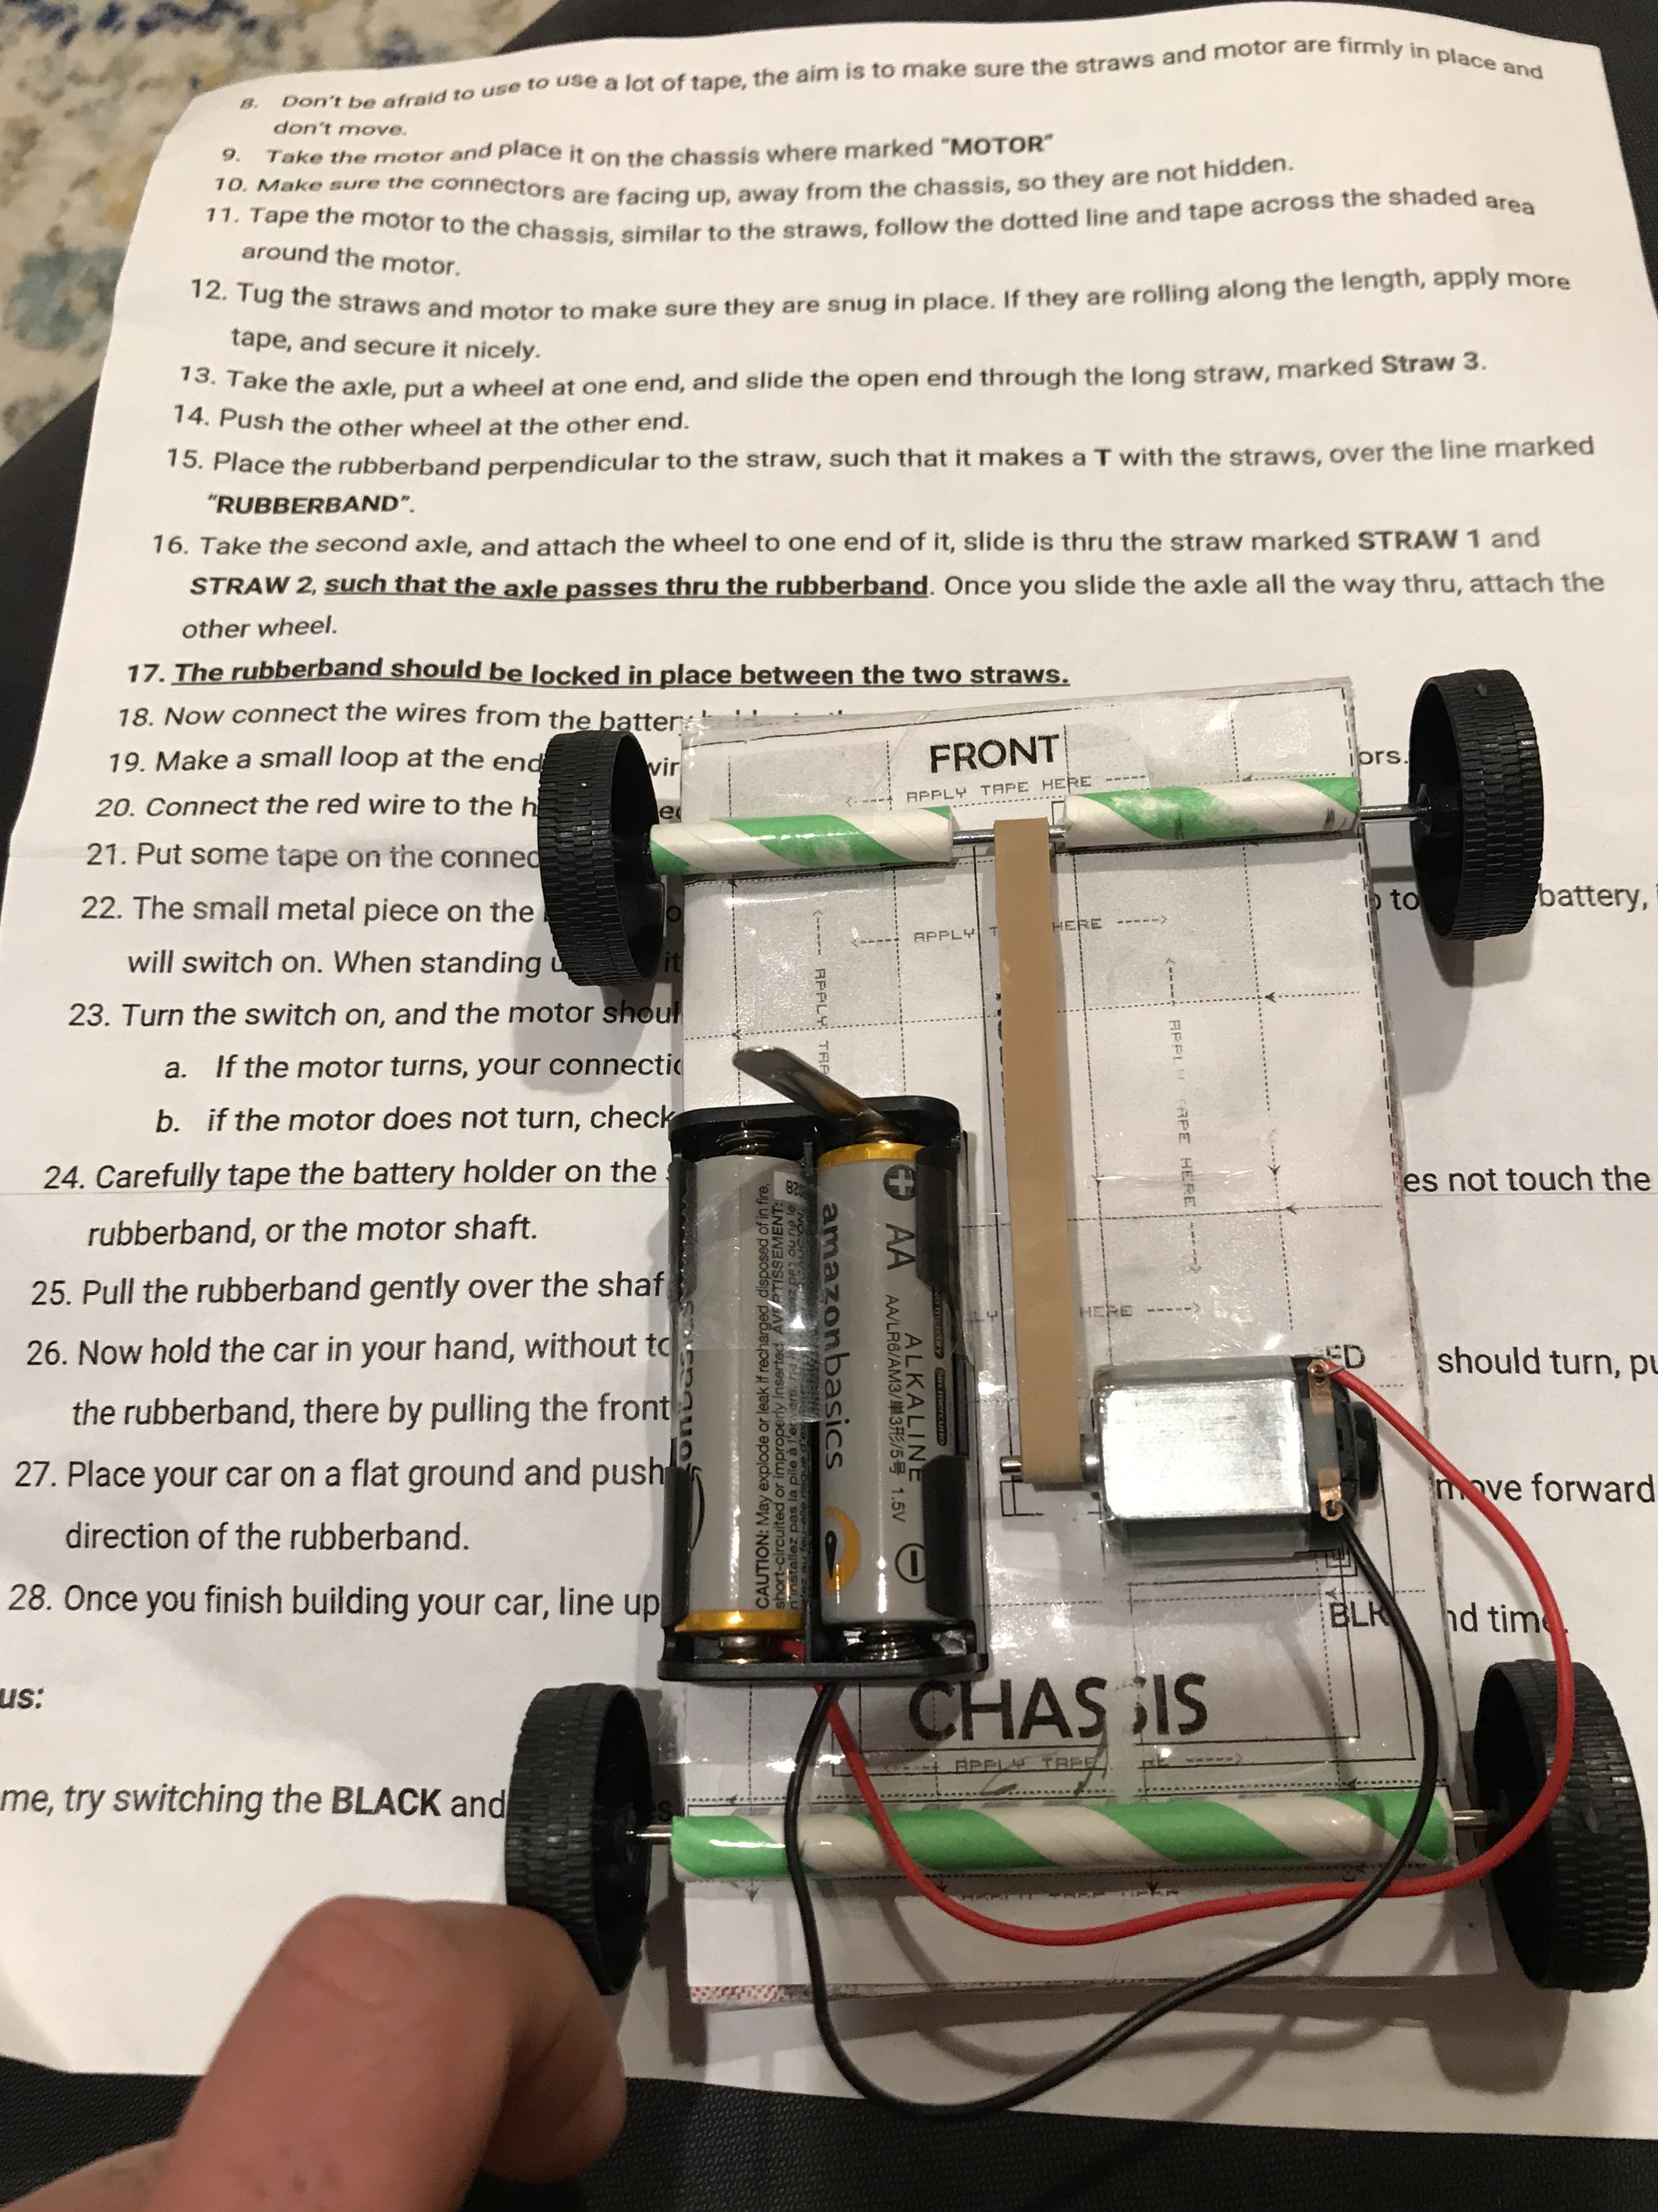
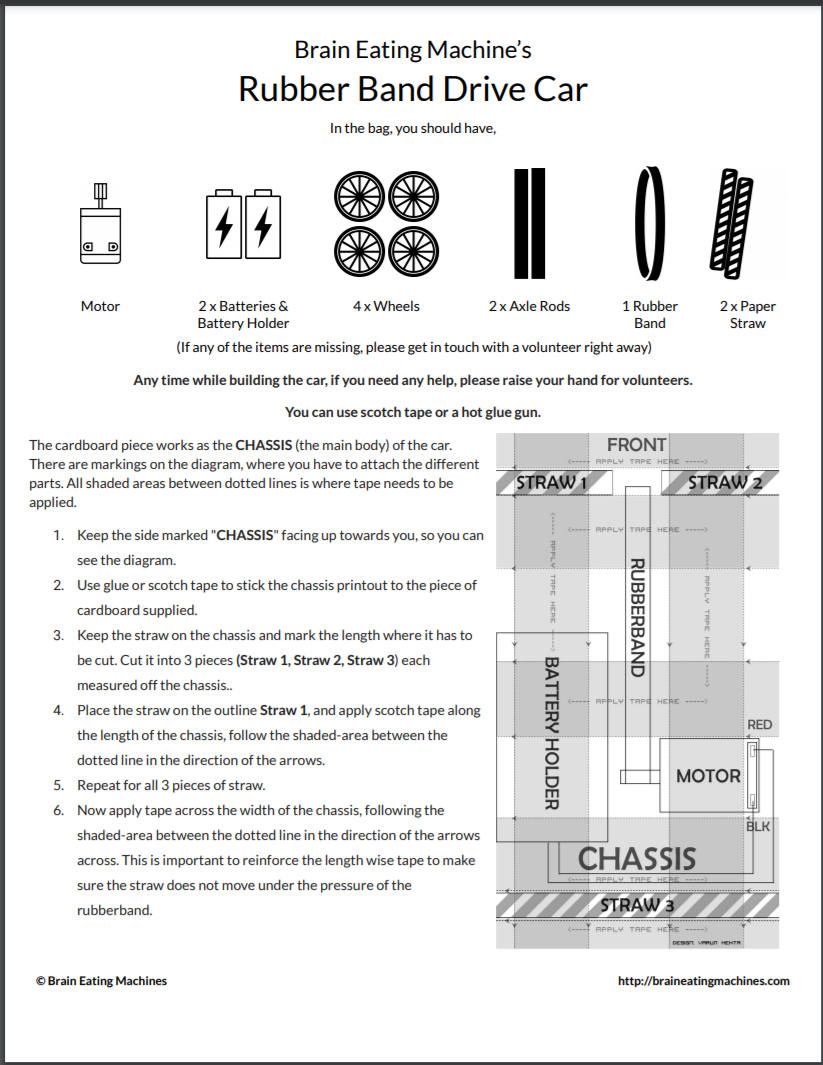
For STEM night, each kid got a bag with parts and printed set of instructions. The kids with a little help from their family had to build a motorized rubber car.
Printable instructions coming soon!
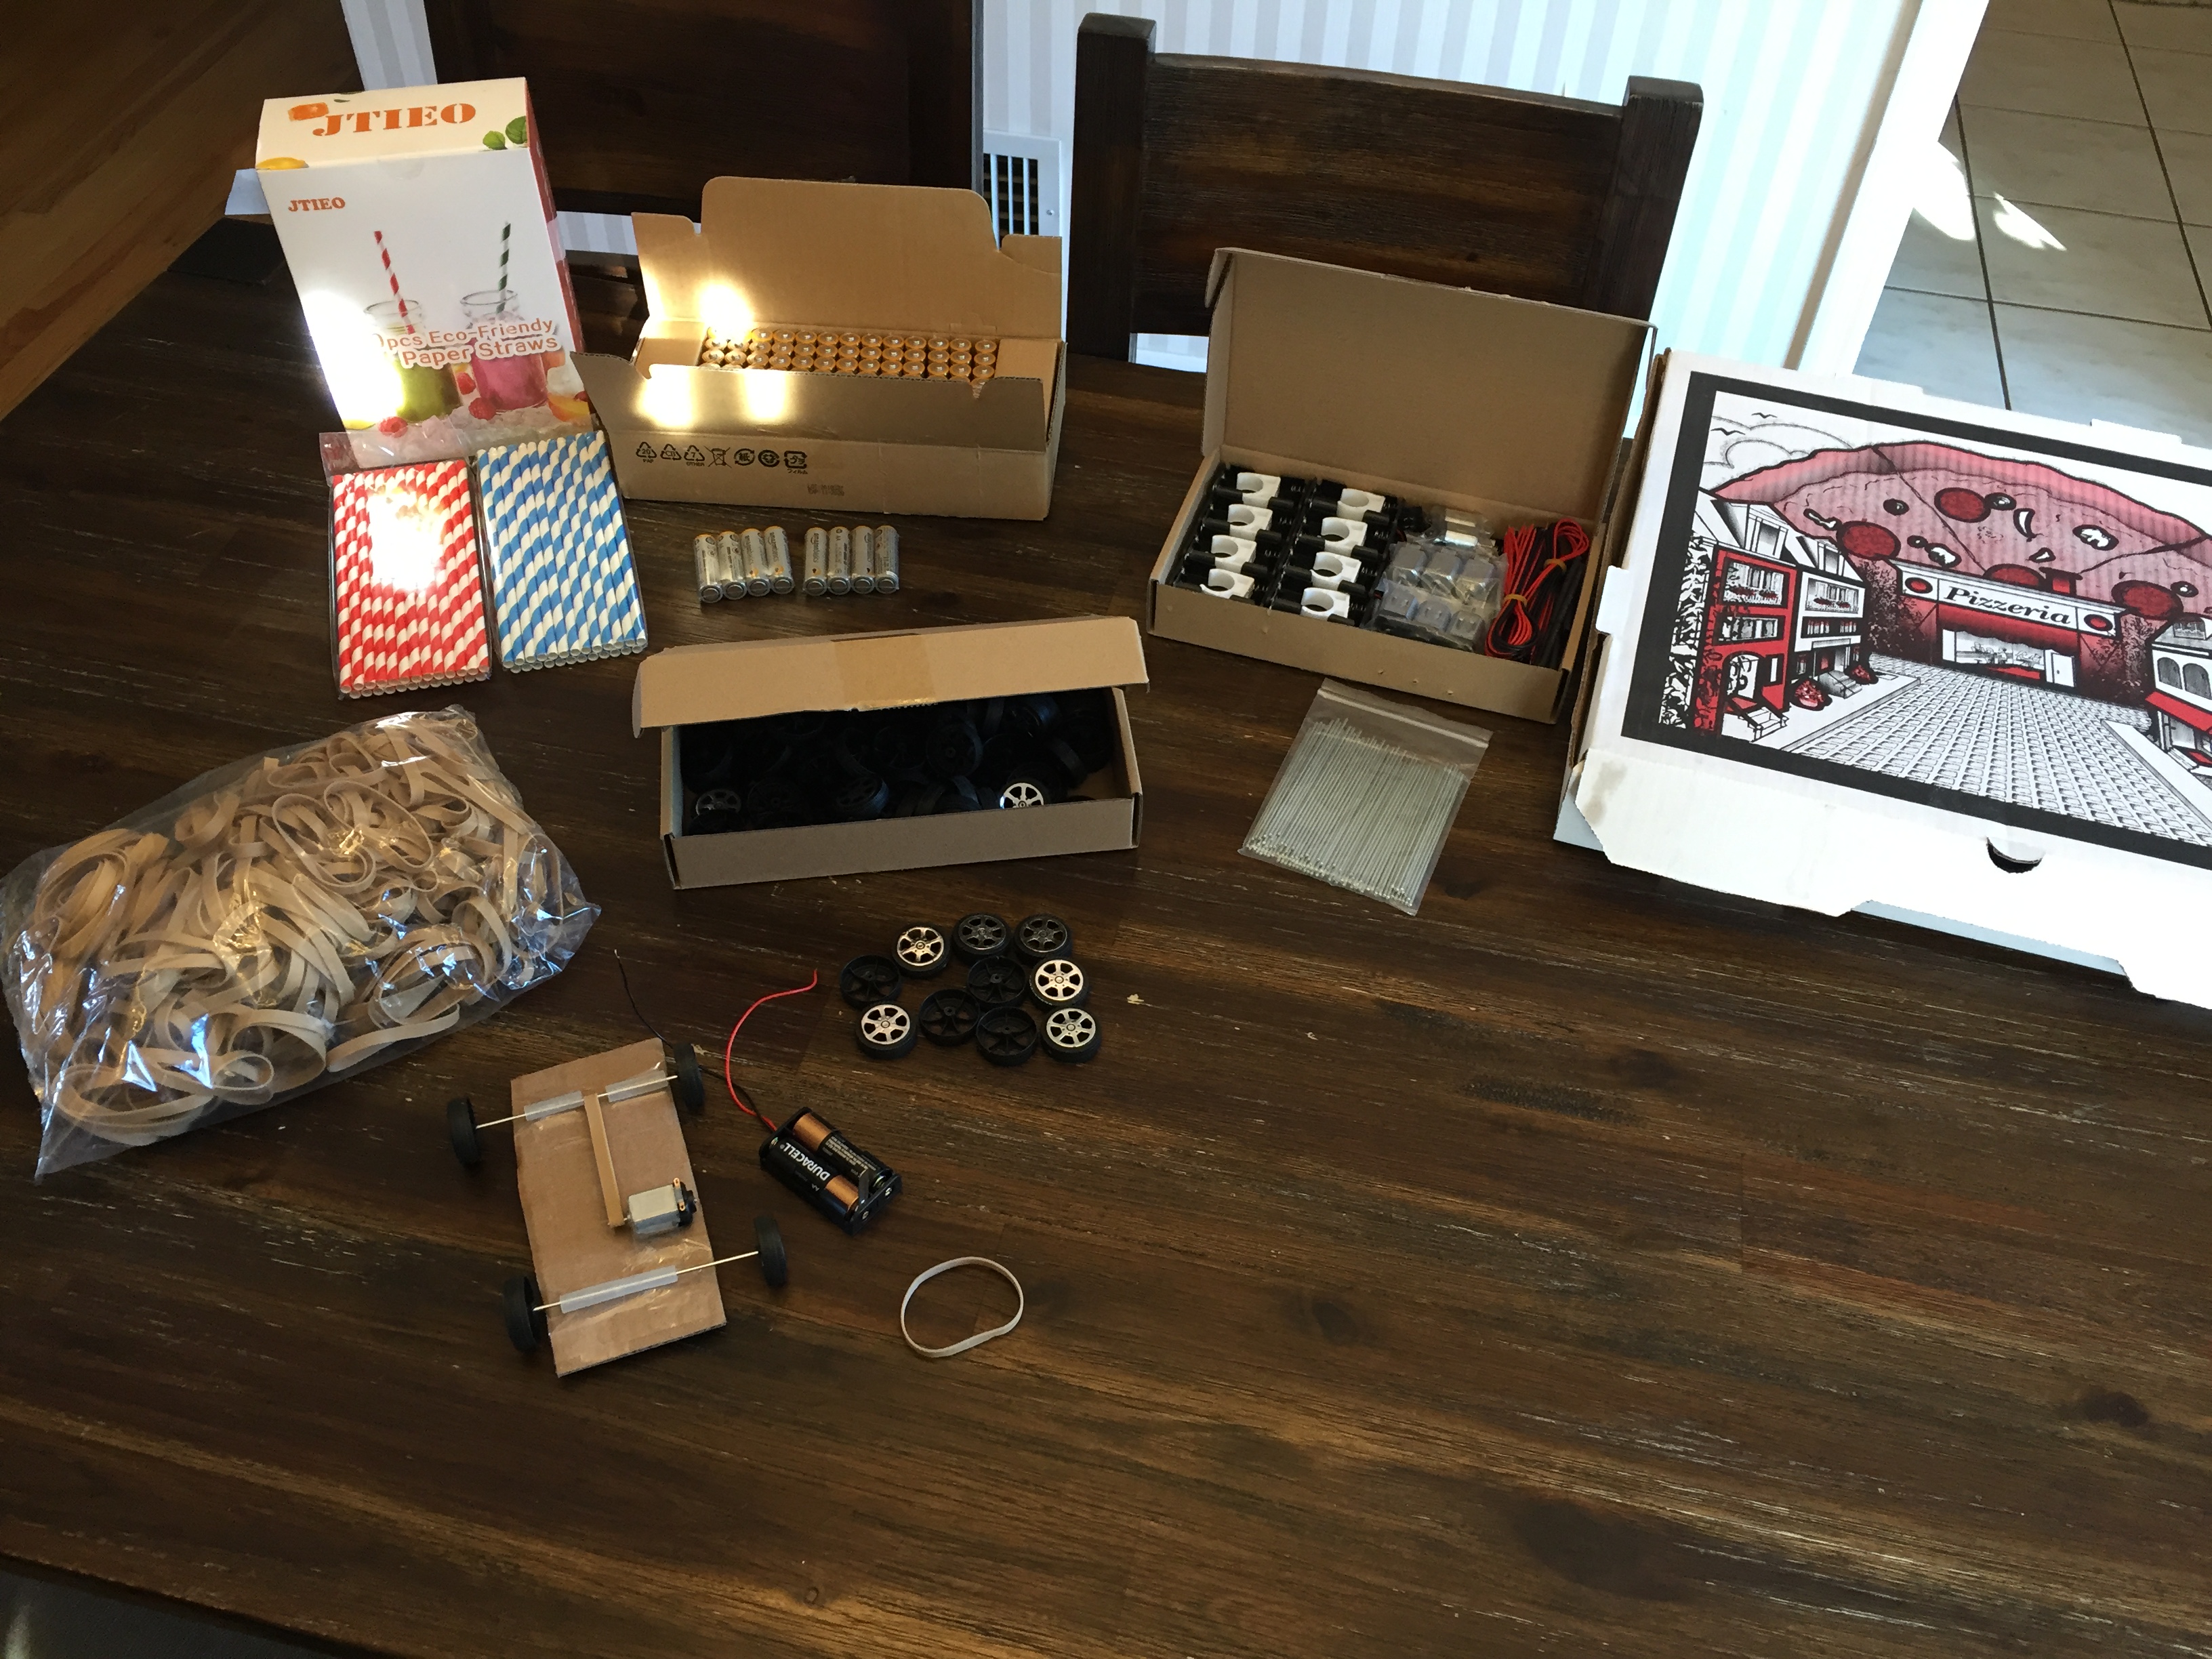
Parts
All parts needed for the project were sourced off amazon
- 3V DC motor
- 2 x AA batteries
- Battery holder with switch
- 4 plastic wheels
- 2 x 100mm metal rods (to be used as axle for the car)
- 1 x 3/4” rubber band
- 2 x paper straws
- 1 x scotch tape (not the magic tape)
- Chassis cut out of pizza boxes
The Build
Chassis
Once you have printed the chassis template, cut along the lines to make 5 individual chassis. Cut cardboard pieces off a pizza box, or any other cardboard to size. Each project needs 1 cardboard piece and 1 cutout print of the chassis.
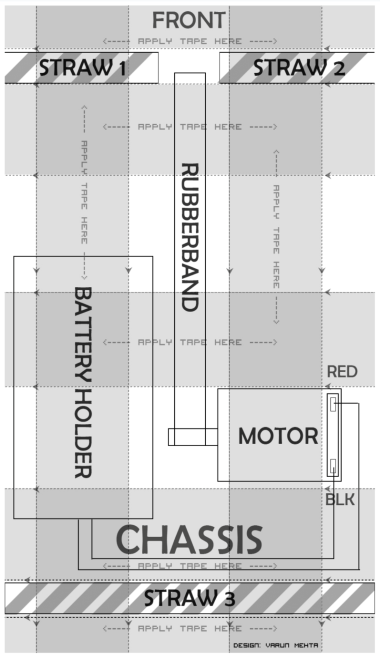
Steps
Print the instructions sheet and provide them as steps along with the package. There are two ways you can conduct it. Give it to kids and let them follow and figure out the instructions, or have an adult walk them through the steps, as they go along. Follow which ever, depending upon your audience.
Final Car