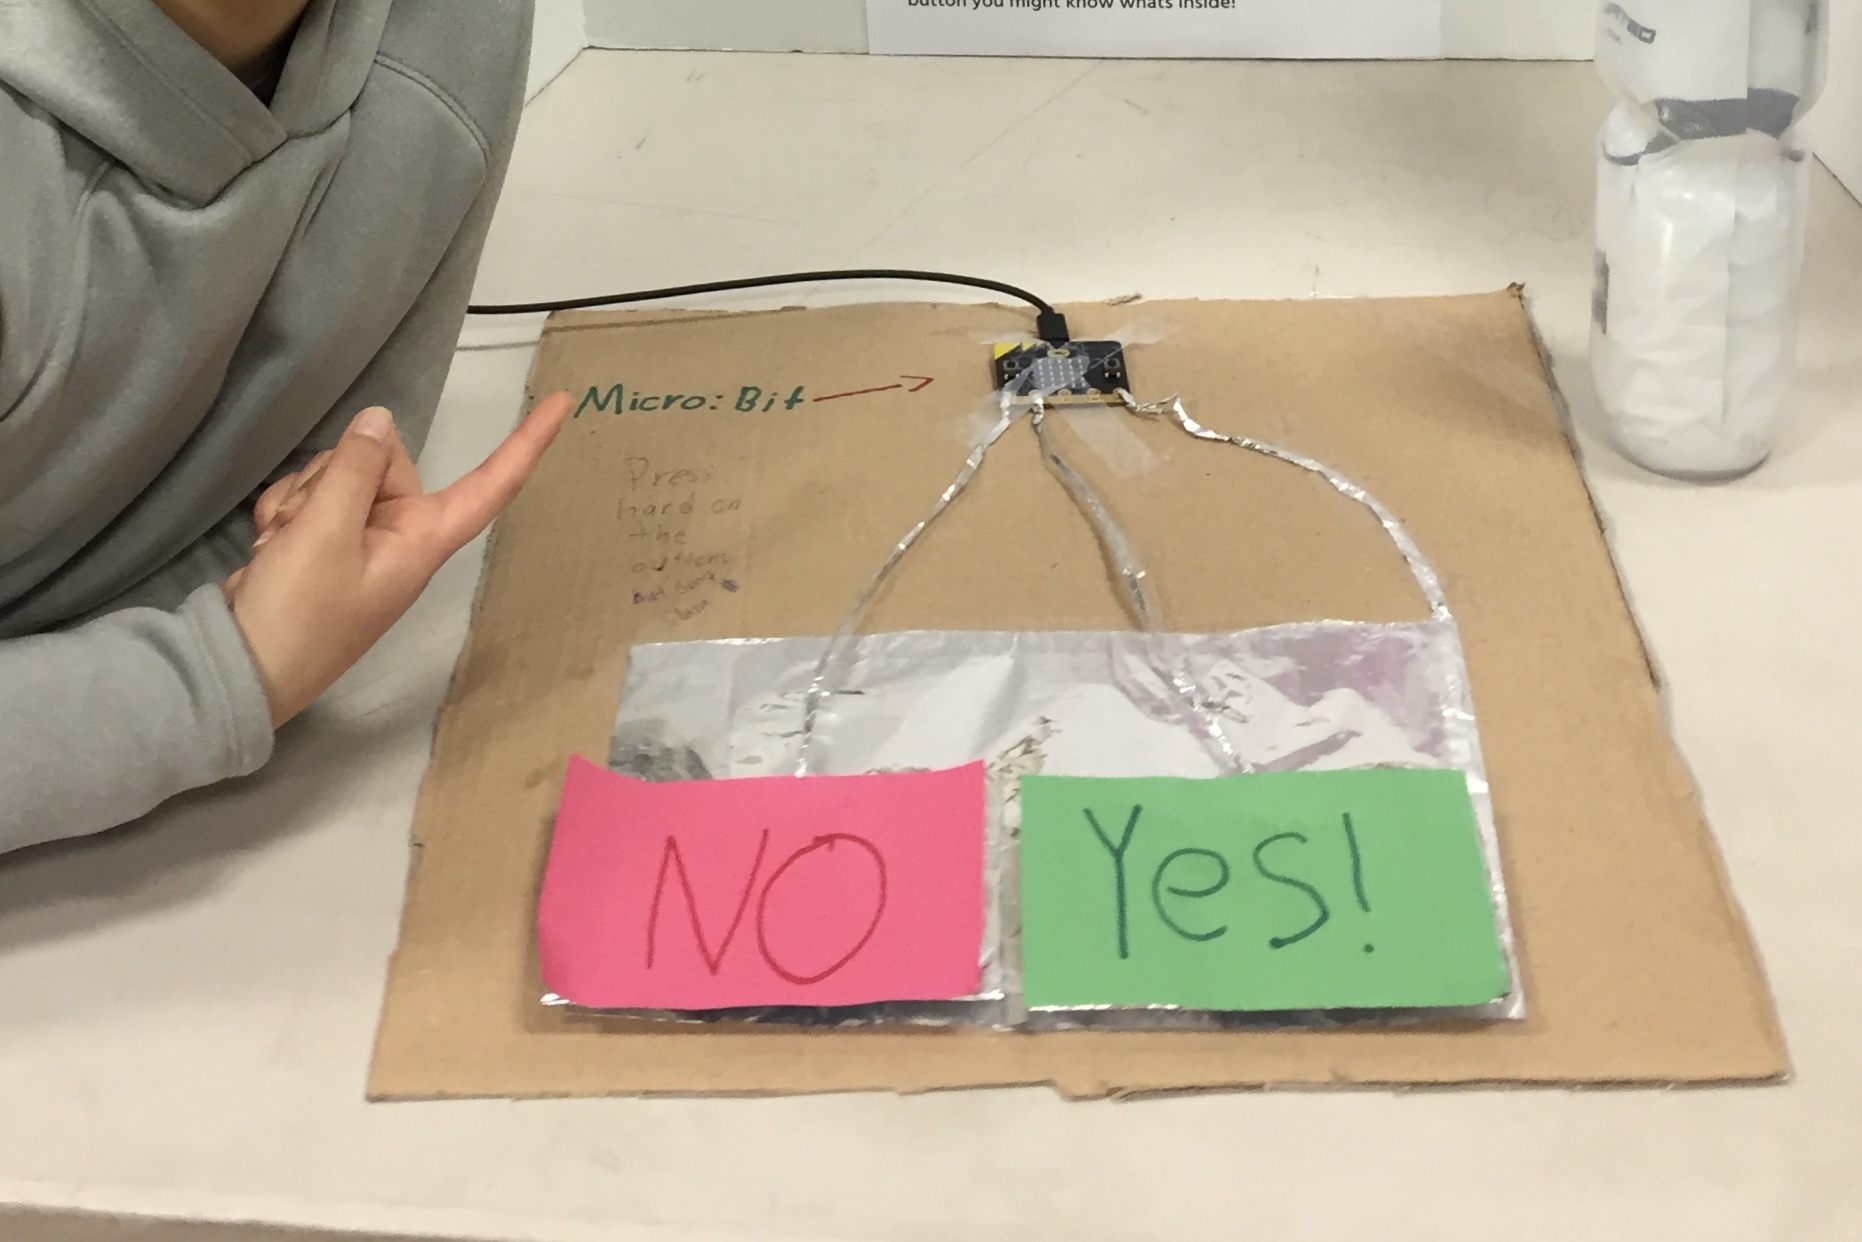
Basic voting machine using a micro:bit.
Build Instructions
Follow the steps to build your own!
Hardware
- Aluminum Foil
- Scotch Brite sponge
- Paper Glue
- 10 x 10 inch cardboard
Steps
- Cut 3 thin strips of aluminum foil and roll them up as 3 different wires.
- Cut a scotch brite sponge in half as button springs.
- Cut 2 small pieces of cardboard 1x1 inch approx and cover it in aluminum foil.
- Tape one end of the aluminum wire to this cardboard piece, the aluminum wire should touch the aluminum on the button.
- Glue the piece of scotch brite to the bottom of cardboard button
- Repeat process to create another button.
- Tape a 6x6 inch of aluminum foil to the big cardboard. (refer image below)
- Connect
P0to the NO button. - Connect
P1to the YES button. - Connect
GNDto the 6x6 inch aluminum foil.
Now every time the button is pressed, the foil on the base of the button will touch the big foil connected to GND and complete the circuit. Refer the code below to see what needs to run on the micro:bit.
Software (Code)
Write the code shown below on make code and transfer it to the micro:bit.
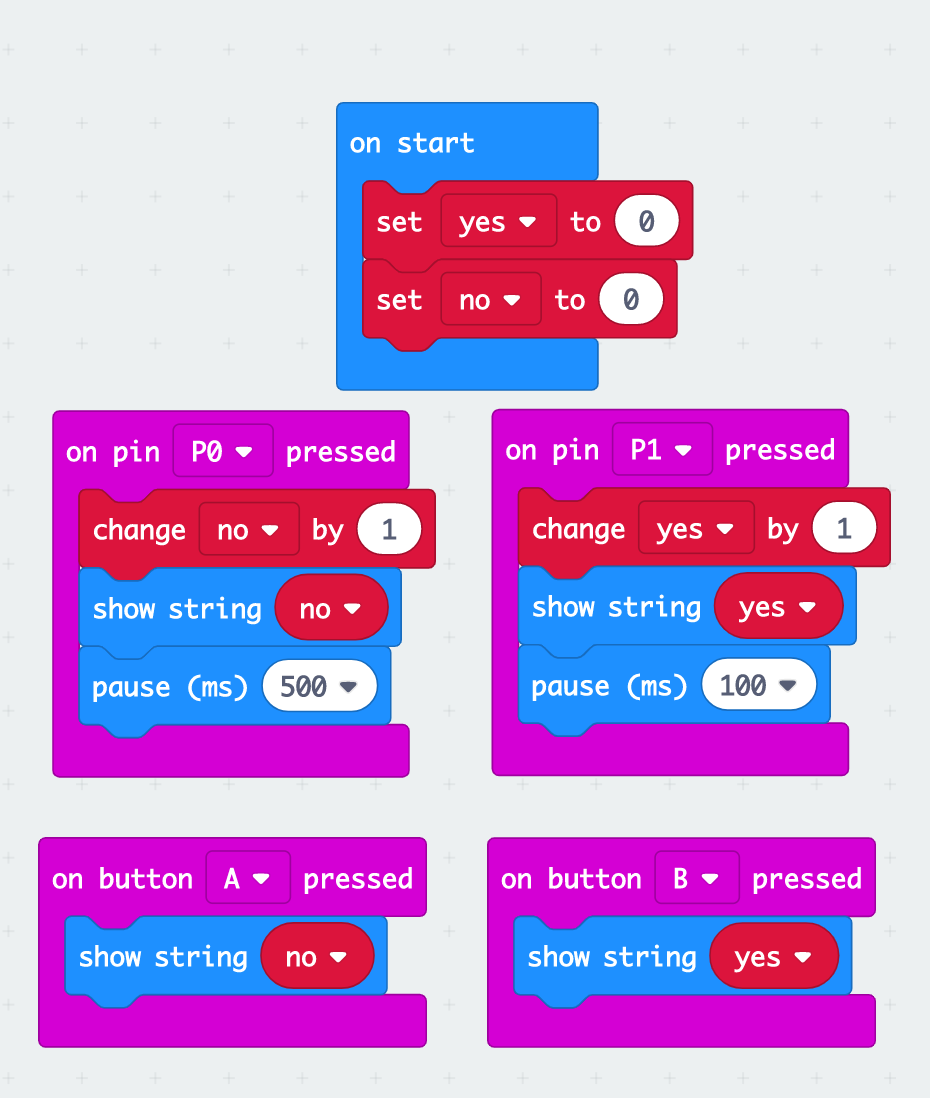
Pressing the button A or B will display the current count of votes.
Learning Outcome
You learn to create the basics voting machine, to capture count of “YES” & “NO” and display the value on every click.